Baking the Perfect Gluten-Free Bread Baguette: A Deliciously Crispy and Healthy Alternative
Are you craving a warm, crispy baguette but following a gluten-free diet? Look no further – we have the perfect solution for you! In this article, we will guide you through the process of baking the perfect gluten-free bread baguette that not only satisfies your craving but also provides a healthy alternative to traditional wheat-based bread.

Using a combination of gluten-free flours and a few secret ingredients, our recipe ensures that you can enjoy all the flavors and textures of a classic baguette while following your dietary restrictions. We’ll walk you through step by step, sharing tips and tricks to achieve that deliciously crispy crust and soft, airy interior.
Whether you’re new to gluten-free baking or a seasoned pro, our recipe is easy to follow and promises to deliver impressive results every time. So, get your apron on and preheat that oven – it’s time to indulge in the ultimate gluten-free bread experience. Your taste buds will thank you!
Join us as we embark on this flavorful journey to create the perfect gluten-free bread baguette that will leave you wanting more. Get ready to bake and embrace the joy of gluten-free eating!
Table of Contents
Understanding gluten-free baking
Gluten-free baking can be a unique and rewarding challenge for home cooks and bakers. Unlike traditional wheat-based baking, gluten-free recipes require a different approach to achieve the desired texture and structure. Gluten, a protein found in wheat, rye, and barley, acts as the binding agent that gives bread its characteristic chewiness and rise.
When baking gluten-free, you’ll need to rely on a combination of alternative flours, starches, and binding agents to replicate these essential qualities. This can take some experimentation and understanding of how different ingredients interact in the baking process. However, with the right techniques and a little practice, you can create gluten-free baked goods that are every bit as delicious and satisfying as their wheat-based counterparts.
The key to successful gluten-free baking is to approach it with an open mind and a willingness to try new ingredients and methods. By understanding the unique properties of gluten-free flours and how to work with them, you can unlock a world of possibilities in the kitchen and create breads, pastries, and other baked goods that cater to a wide range of dietary needs and preferences.
The health benefits of gluten-free bread
Gluten-free bread has gained popularity in recent years, not only among individuals with celiac disease or gluten intolerance but also among those seeking a healthier alternative to traditional wheat-based bread. While the primary reason for the rise in gluten-free diets is the need to manage medical conditions, the health benefits of gluten-free bread extend beyond just addressing these concerns.
One of the main advantages of gluten-free bread is that it is often made with a variety of nutrient-dense, whole-grain flours, such as almond, coconut, or quinoa flour. These alternative flours are typically higher in fiber, vitamins, and minerals compared to refined wheat flour used in conventional bread. This can contribute to improved digestive health, better blood sugar regulation, and a more balanced nutritional profile.
Additionally, gluten-free bread is often free from artificial additives, preservatives, and other processed ingredients that can be found in some mainstream bread products. By opting for a homemade or artisanal gluten-free bread, you can enjoy a cleaner, more wholesome baked good that aligns with a healthier lifestyle. Furthermore, the elimination of gluten can be beneficial for individuals with celiac disease or non-celiac gluten sensitivity, as it can help alleviate symptoms and promote overall well-being.
Common challenges in baking gluten-free bread baguettes
Baking gluten-free bread baguettes can present a unique set of challenges compared to traditional wheat-based baguettes. The absence of gluten, which is the key structural protein in wheat flour, requires a different approach to achieve the desired texture and rise.
One of the primary challenges is replicating the chewy, crispy crust and light, airy interior that are hallmarks of a classic baguette. Gluten-free flours tend to lack the elasticity and binding properties of wheat flour, which can result in a dense, crumbly texture if not properly addressed. Additionally, the lack of gluten can make it more difficult to achieve the characteristic long, slender shape and even rise of a baguette.
Another common challenge is ensuring the dough has the right consistency and holds its shape during the proofing and baking process. Gluten-free doughs can be more delicate and prone to collapsing or spreading, which can compromise the overall structure and appearance of the baguette. Achieving the right balance of hydration, binding agents, and proofing techniques is crucial to overcome these obstacles.
Gluten-free bread baguette ingredients and substitutions
Creating a delicious and authentic-tasting gluten-free bread baguette requires a carefully selected blend of gluten-free flours and other key ingredients. While the specific recipe may vary, there are some common ingredients and substitutions that can be used to achieve the desired texture and flavor.
The foundation of a gluten-free bread baguette is typically a combination of gluten-free flours, such as rice flour, tapioca flour, or almond flour. These flours provide the base structure and help to replicate the crumb and texture of a traditional baguette. To enhance the rise and binding properties, you may also incorporate starches like potato starch or arrowroot powder.
In addition to the flours, other essential ingredients include yeast, which is responsible for the leavening and rise of the dough, as well as eggs or egg replacers to help bind the ingredients together. Healthy fats, such as olive oil or coconut oil, can also contribute to the overall mouthfeel and richness of the baguette. Depending on your dietary preferences or needs, you can explore various substitutions, such as using a flax or chia seed “egg” for a vegan option.
Step-by-step guide to baking the perfect gluten-free bread baguette
Baking the perfect gluten-free bread baguette may take some practice, but with the right techniques and attention to detail, you can achieve impressive results. Here is a step-by-step guide to help you create the ultimate gluten-free baguette in your own kitchen.
1. Gather your ingredients: Assemble all the necessary gluten-free flours, starches, yeast, eggs (or egg replacer), and any other required ingredients. Ensure they are at room temperature for optimal performance.
2. Mix the dry ingredients: In a large bowl, combine the gluten-free flour blend, starches, yeast, and any other dry seasonings or spices. Whisk them together to ensure even distribution.
3. Add the wet ingredients: In a separate bowl, whisk together the eggs (or egg replacer), oil, and any other wet ingredients, such as water or milk. Gradually pour the wet mixture into the dry ingredients, mixing until a cohesive dough forms.
4. Knead the dough: Using a stand mixer fitted with a dough hook or by hand, knead the dough for several minutes until it becomes smooth, elastic, and well-combined. This step is crucial for developing the gluten-free structure.
5. Proof the dough: Transfer the dough to a lightly greased bowl, cover it with a damp towel or plastic wrap, and let it rise in a warm, draft-free environment for 1-2 hours, or until it has doubled in size.
6. Shape the baguettes: Gently punch down the dough to release any air pockets. Divide the dough into equal portions and shape them into long, slender baguettes. Use your hands or a rolling pin to achieve the desired length and shape.
7. Final proof: Place the shaped baguettes on a parchment-lined baking sheet, cover them, and let them proof for an additional 30-60 minutes, or until they have increased in size and hold their shape.
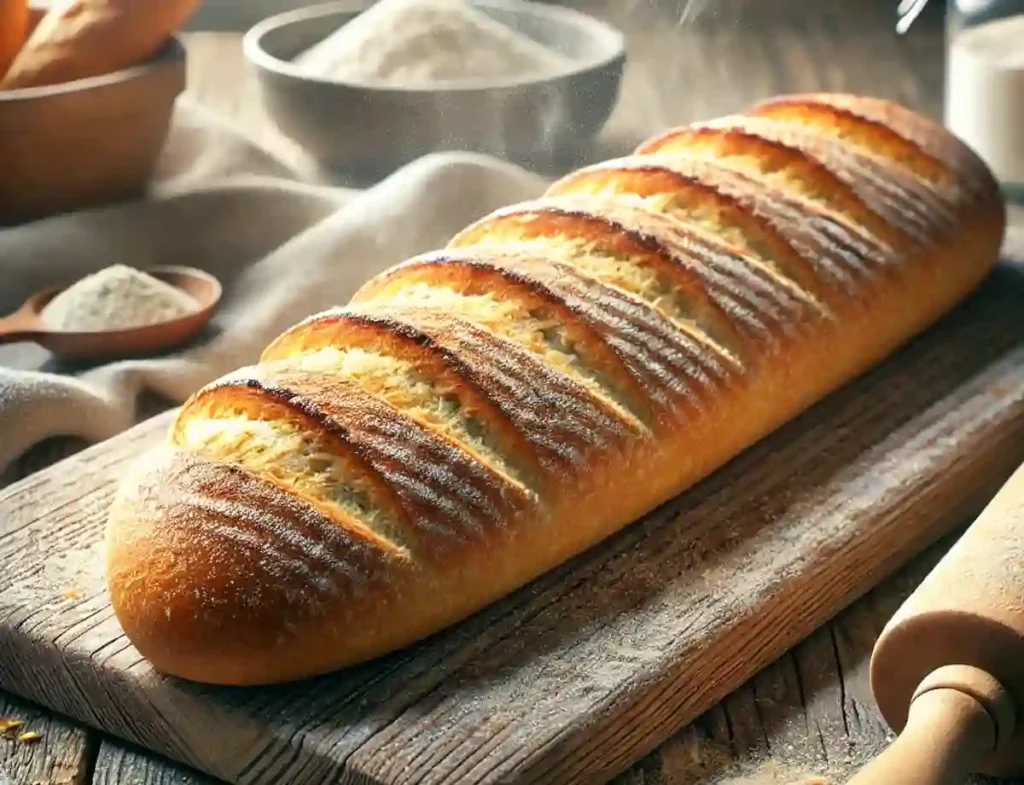
8. Score and bake: Just before baking, use a sharp knife or lame to score the top of the baguettes, creating diagonal slashes. This will help the bread expand and develop a crispy crust. Bake the baguettes in a preheated oven at a high temperature (400°F/200°C) for 20-25 minutes, or until they are golden brown and sound hollow when tapped.
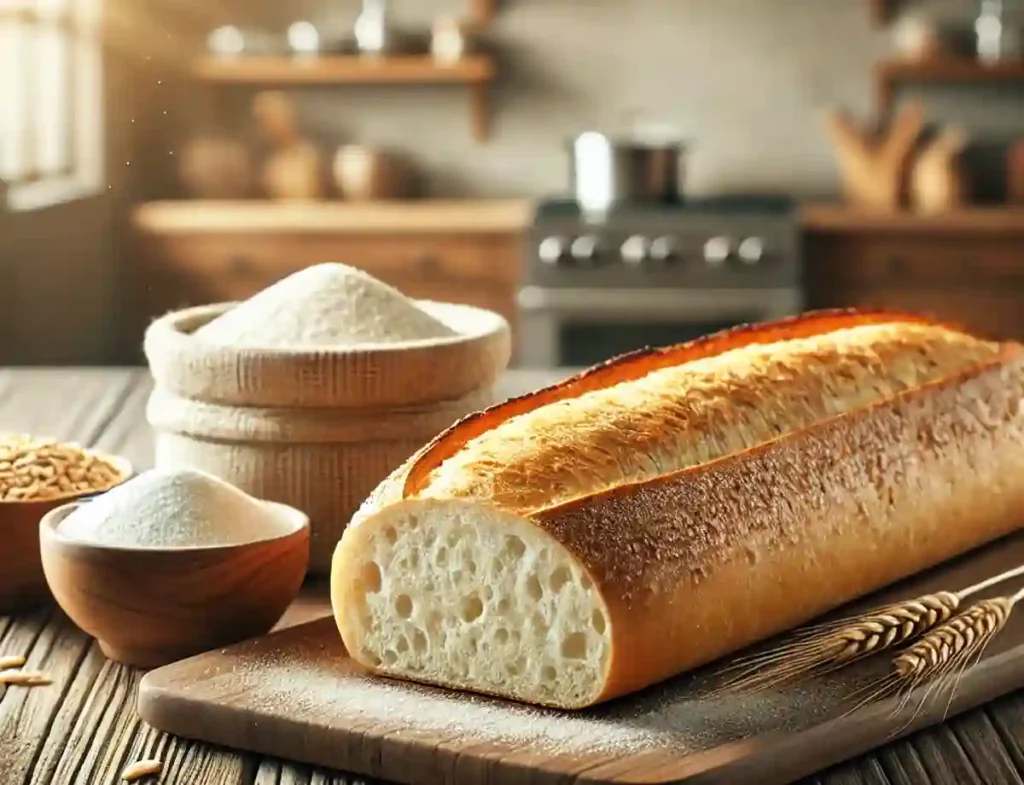
9. Cool and enjoy: Remove the baguettes from the oven and let them cool on a wire rack before slicing and serving. Savor the crispy crust and soft, airy interior of your homemade gluten-free bread baguette.
Tips and tricks for achieving a crispy crust and fluffy interior
Baking the perfect gluten-free bread baguette with a crispy crust and fluffy interior requires a few key techniques and tricks. By understanding the science behind gluten-free baking and incorporating these strategies, you can elevate your gluten-free baguette to new heights.
One of the most important factors in achieving a crisp crust is proper hydration. Gluten-free doughs tend to be drier and more prone to a dense, crumbly texture. By adding the right amount of water or other liquids, you can create a dough that is supple and malleable, allowing it to expand and develop a beautiful crust during baking.
Another crucial element is the use of steam during the baking process. Introducing steam into the oven helps to create a moist environment that encourages the dough to rise and develop a shiny, crackly crust. You can achieve this by placing a heat-safe pan filled with water on the bottom rack of your oven, or by spraying the dough with water before baking.
Additionally, the type of gluten-free flours and starches you use can significantly impact the texture and rise of your baguette. Experiment with different blends, such as a combination of rice flour, tapioca starch, and psyllium husk, to find the right balance that provides structure and lightness. Incorporating ingredients like xanthan gum or chia seeds can also help to mimic the binding properties of gluten, leading to a more cohesive and airy crumb.
Adding flavor and texture to your gluten-free bread baguette
While the primary focus of gluten-free baking is often on replicating the structure and texture of traditional wheat-based breads, you can also explore ways to enhance the flavor and sensory experience of your gluten-free bread baguette. By incorporating a variety of ingredients and techniques, you can create a truly unique and delectable gluten-free baked good.
One way to add depth of flavor is by incorporating aromatic herbs, spices, or seeds into the dough. For example, you could try adding a teaspoon of dried rosemary, a pinch of fennel seeds, or a dash of garlic powder to the dry ingredients. These flavorful additions can complement the nutty or earthy notes of the gluten-free flours and provide a more complex, satisfying taste.
To introduce textural contrast, you can consider incorporating crunchy elements, such as toasted nuts or seeds, into the dough or as a topping. The interplay of the crisp exterior and the soft, pillowy interior can create a truly captivating sensory experience. Alternatively, you could experiment with different scoring patterns or techniques, like creating a lattice design on the surface of the baguette, to add visual interest and unique textures.
Finally, don’t be afraid to experiment with alternative baking methods, such as using a pizza stone or a Dutch oven, to achieve a more professional-looking and evenly baked gluten-free baguette. These techniques can help to mimic the conditions of a commercial oven and contribute to the overall quality and presentation of your homemade creation.
Serving and storing gluten-free bread baguettes
Serving and storing your homemade gluten-free bread baguettes properly can help to maintain their freshness, texture, and flavor. By following a few simple guidelines, you can ensure that your baguettes are enjoyed at their best.
When it comes to serving, it’s best to allow the baguettes to cool completely before slicing. This will help to prevent the crumb from becoming too dense or gummy. Once cooled, you can slice the baguettes into desired portions and serve them with your favorite toppings, such as butter, cheese, or dips.
For optimal freshness, it’s recommended to consume the gluten-free baguettes within a day or two of baking. The crisp crust and soft interior will be at their peak during this time. If you have leftover baguettes, you can store them in an airtight container or wrap them in a clean, dry towel to help retain moisture and prevent the crust from becoming too hard.
If you need to store the baguettes for longer, you can wrap them tightly in plastic wrap or aluminum foil and freeze them for up to 2-3 months. When ready to enjoy, simply thaw the baguettes at room temperature or reheat them in the oven for a few minutes to revive the crispy crust and warm, fluffy interior.
Gluten-free bread baguette recipes for different dietary needs
One of the great advantages of baking gluten-free bread baguettes is the ability to cater to a wide range of dietary needs and preferences. Whether you’re following a vegan, dairy-free, or low-carb lifestyle, there are numerous variations of the gluten-free baguette recipe that can accommodate your specific requirements.
For our vegan readers, you can easily substitute the eggs in the recipe with a flax or chia “egg” (1 tablespoon of ground flax or chia seeds mixed with 3 tablespoons of water). Additionally, you can use plant-based milk or water in place of dairy-based milk, and opt for a neutral-tasting oil, such as avocado or coconut oil, instead of butter.
If you’re following a low-carb or keto diet, you can experiment with alternative flour blends that are lower in carbohydrates, such as almond flour, coconut flour, or a combination of these. You may need to adjust the ratios of wet to dry ingredients to achieve the desired texture, but the overall baking process remains the same.
For those with nut allergies, you can explore gluten-free flour options that are nut-free, such as rice flour, sorghum flour, or a blend of these with starches like tapioca or potato starch. Be mindful of any other dietary restrictions or sensitivities when selecting your ingredients to ensure a safe and enjoyable baking experience.
Conclusion: Enjoying the satisfaction of homemade gluten-free bread baguettes
Baking the perfect gluten-free bread baguette may require a bit more effort and experimentation compared to traditional wheat-based baking, but the rewards are well worth it. Not only do you get to indulge in the warm, crispy, and delicious goodness of a freshly baked baguette, but you also have the satisfaction of creating a healthier, gluten-free alternative that caters to your dietary needs.
Throughout this journey, you’ve learned the key principles of gluten-free baking, the health benefits of gluten-free bread, and the common challenges in achieving the perfect gluten-free baguette. With the step-by-step guide, tips and tricks, and recipe variations, you now have the tools and knowledge to confidently bake your own gluten-free bread baguettes at home.
Embrace the joy of homemade baking and the ability to enjoy a warm, crusty baguette without compromising your dietary restrictions. Whether you’re serving it alongside a hearty soup, using it as the base for a delectable sandwich, or simply savoring it on its own, the satisfaction of creating a gluten-free masterpiece in your own kitchen is truly unparalleled.
So, preheat your oven, gather your ingredients, and let’s embark on this gluten-free baking adventure together. Discover the delight of a perfectly baked gluten-free bread baguette and savor every bite, knowing that you’ve created a healthy and delicious alternative that caters to your unique dietary needs.
Health Disclaimer:
The content provided on this blog is for informational purposes only and is not intended as a substitute for professional medical advice, diagnosis, or treatment.
Always seek the guidance of your physician or another qualified healthcare provider with any questions you may have regarding a medical condition.
We make no representations or warranties regarding the accuracy, completeness, or suitability of the information provided, and we take no responsibility for any actions taken based on the content of this blog.
The use of this blog and this blog article is at your own risk.